I hadn't intended on planting anything until spring but when I can across a scrub shirt with Halloween Hello Kitty's on it, I knew I needed to do something now. I want to make this a limited time plant and they will probably be out in general population by next week until November. For the first stamp I copied and manipulated the image on our copier at work and then found an image of flames on google. I then messed around with that image on Photoshop until I had what I wanted and then superimposed one image on the other and traced it. Tracing paper WILL be my saving grace in the carving game, I swear. Here is the image shorty after I transferred it to the PZCut:
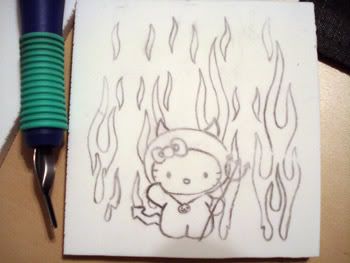
I then let it sit on my coffee table staring at it overnight because I was afraid to cut into it. It just looked so cute and exactly what I had envisioned in my head that it was really intimidating. Finally, the next day I just picked it up and started carving it. I'm very thankful that I ordered the Staedtler #1 tool because it handles so much better (for me) than the Speedball cutters. I really need to order the rest of the set.

Once I got going, the image seemed to cut itself out. It was a lot easier than I remembered (I had previously one made 2 stamps months ago, for logging in). I'm still having issues with the small areas but I am learning different ways to do it and reading any and every tutorial/advice I can.

The flames turned out being the easiest part, my cutting tool just seemed to want to follow the edge of them. I had a little issue with the pitchfork since I didn't have the foresight to either place it fully on or fully off a flame so it's half negative and half positive. It looks a little awkward but I'm proud of myself for figuring out a solution.

I've also discovered an unforeseen problem in this carving process: I am really impatient and halfway through just want it done so I can stamp it and see what it looks like, haha! I did figure out that I need to almost full carve it first, then put ink on it and stamp it to see where I need to touch up. It just gets kind of difficult when you're staring at all that white to see what the problem areas are.

It really only took me about an hour or two of total time to carve the whole thing, which surprises me. I'm sure that will decrease as I get more used to it. I also need to work on my usual perfectionist attitude because it doesn't always turn out perfect and that doesn't mean I need to chuck the whole thing and start again (even if I want to). So here's the final image:
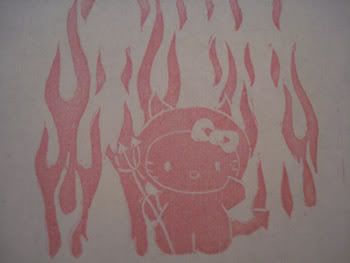
It's not mounted on wood with foam yet so it doesn't stamp exactly the way I want it to, but hopefully it does once it's finished. Then I get to figure out where they're going and plant them! I can't wait, I'm so excited to put my very first stamps out into the LB'ing world :)

No comments:
Post a Comment